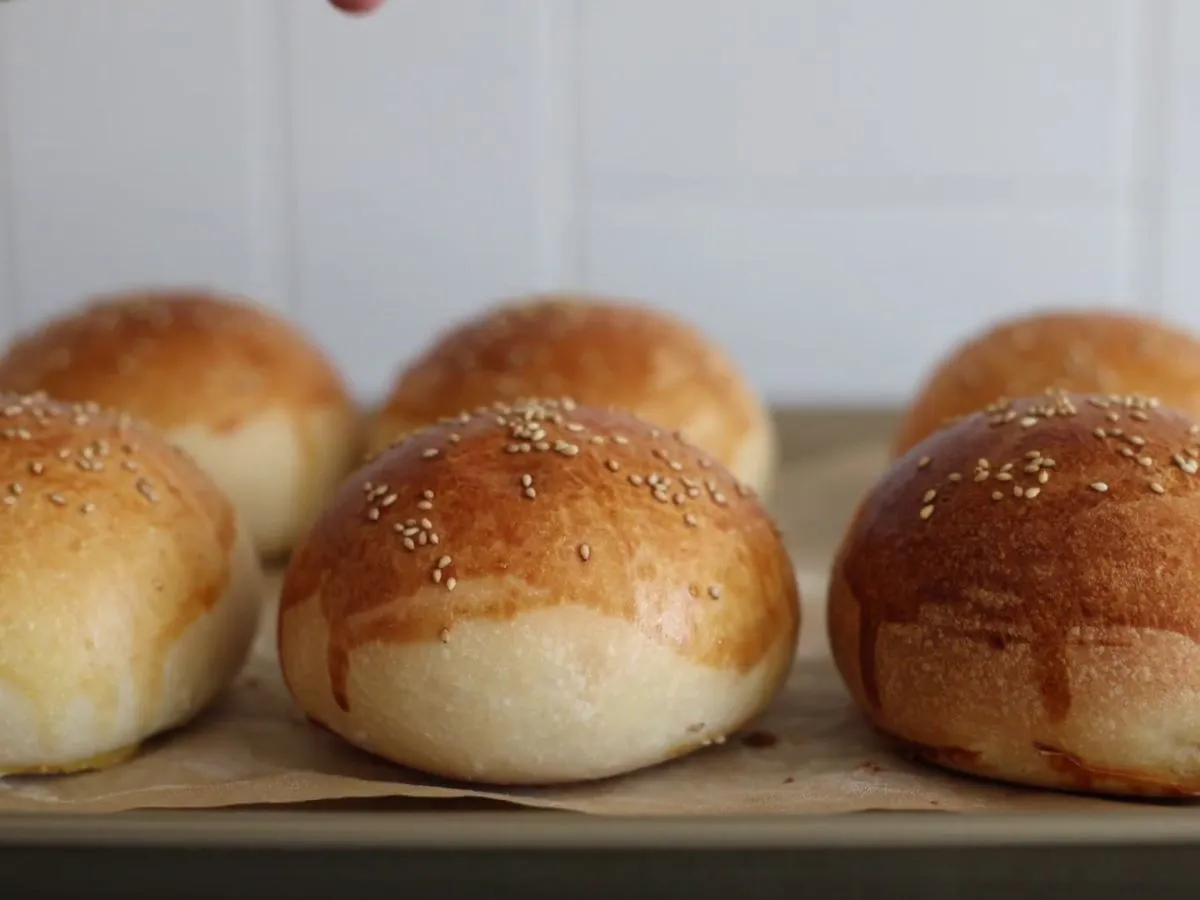
Sourdough hamburger buns are nice, fluffy, and a soft canvas for any burger and go well with any sandwich filling. Light brown crusty top and an inside spongy bread is so fun to make at home!!
You all know summer is here, so what’s better than a big hamburger with a meat patty, lots of greens, cheese, and a big heirloom tomato slice? Whether a BBQ party or an outdoor cooking smash burger is a must.
Instead of buying old, stale buns from the store, why not make them fresh at home? sourdough bun burger are better than any store-bought bun. Most store-bought sourdough bread is not prepared using a traditional method, so it is not as nutritious as homemade. I have tested the recipe many times, and now, after years of getting the perfect buns, I have cracked the secret that never disappoints me!
Table of Contents
Why Sourdough?
Phytate (phytic acid) is present in grains of flour and is an antinutrient. It means it can reduce the body’s ability to absorb nutrients by binding minerals in their active form. However, the fermentation process in making the sourdough starter deactivates the phytate due to its low pH (it is Acidic due to lactic acid formation by bacteria during fermentation). In fact, our body gets a lot of nutrients because of less active phytate.
That’s why to get tastier and nutritious bread, sourdough is always a top tier for baking bread over conventional bread. Fermentation is natural and beneficial in many terms. Sourdough grain fermentation is one of the oldest methods of making bread. Ever since a few centuries ago, the typical yeast has taken its place but just don’t forget our tradition. I am obsessed with having them straight out of the oven.
Tools for Sourdough Hamburger Bun Recipe
- Stand mixer with C-curve dough hook
- Whisk for mixing wet ingredients
- A spoon for mixing the dough roughly before kneading
- A dough scraper to cut the dough
- A weight scale for accurate measurements
Timing for Bakers
Day 1
8 am: Feed the sourdough starter
3 pm to 8 pm: Combine the dough and rest to double
8 pm to any time other day: Cold proofing
Day 2
8 am or any time onward the next day: Shape to ball and arrange on a baking tray
9 am (or any time): Final proofing
12 pm: Egg wash and Bake
Ingredients
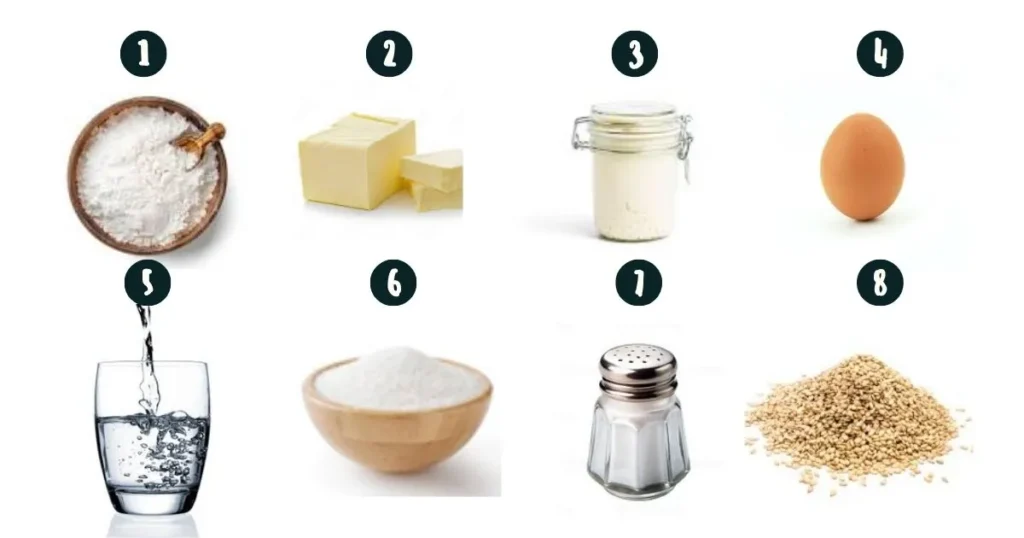
- Bread Flour: Good-quality bread flour can yield soft buns that not only hold all the sandwich filling but also taste yum if enjoyed solo. You can definitely use all-purpose or whole wheat flour, but I think bread flour is great for the buns.
- Butter: Melted unsalted butter at room temperature for a smooth dough.
- Sourdough Starter: Take an active and bubbly starter that is fed 4-8 hours before. The colony of wild yeast and bacteria helps the bread rise. The carbon dioxide gas produced by these active culture traps inside the dough, causing it to rise.
- Egg: A large egg for dough and a yolk for egg wash.
- Water: 40-45% hydration is necessary for sourdough buns. Water should be at room temperature or a little bit warm, not hot. The hot water will destroy the active wild yeast necessary for the fluffy sourdough burger buns.
- Sugar: Granulated sugar has a nice taste, and most importantly, it helps the buns brown on the outside.
- Salt: Sweetness from sugar and tanginess from sourdough starter are balanced by a little bit of salt.
Instructions
1.Whisk the Wet Ingredients
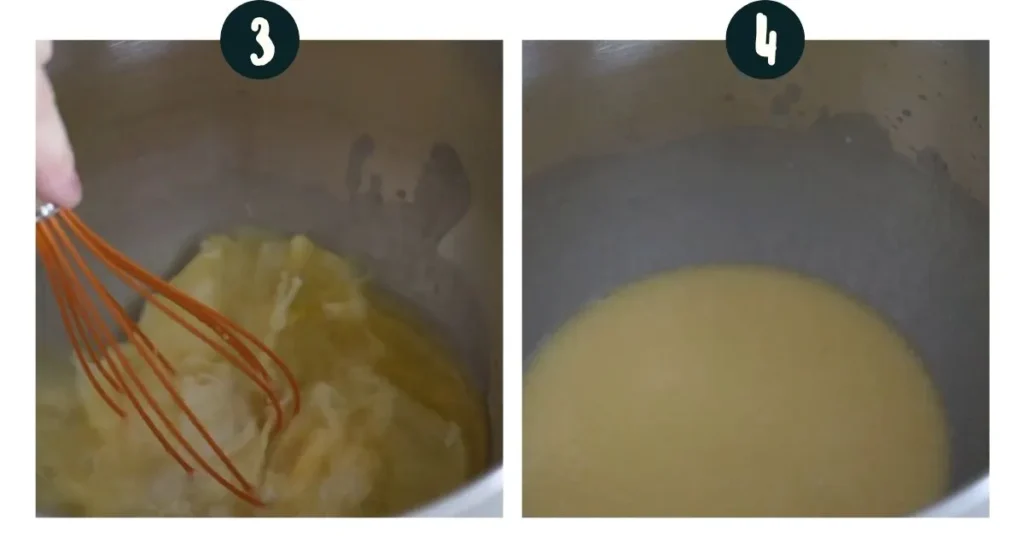
In a stand mixer bowl, mix water, melted butter, egg, and sourdough starter with a whisk until a smooth wet mixture is formed.

Mixing wet ingredients is important to create a smooth liquid mixture and dissolve the sourdough starter evenly.
2. Add the Dry Ingredients
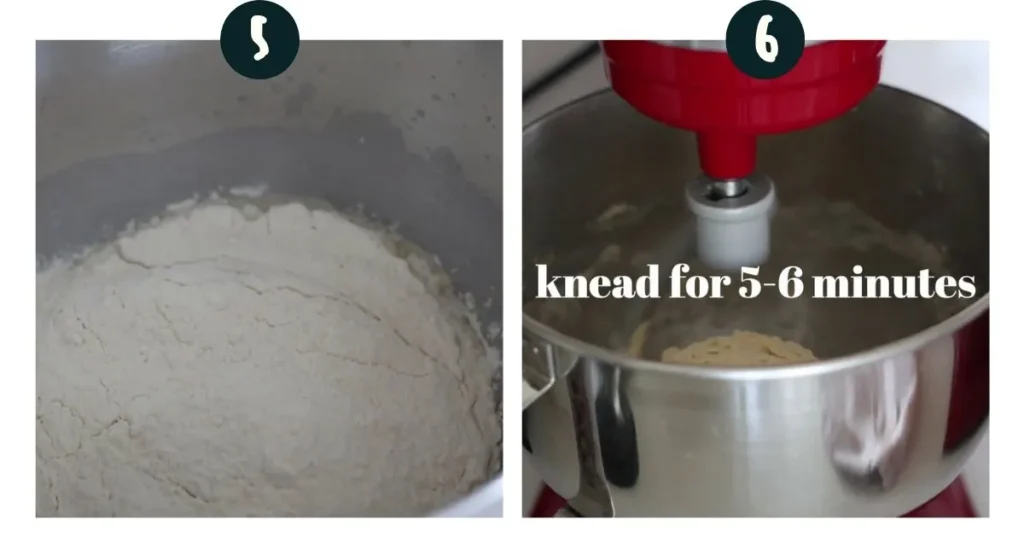
Add sugar, salt, and bread flour to the wet mixture and roughly mix with a spoon.
3.Knead To Dough
Place the bowl in a stand mixer with a dough hook attachment and knead the dough for 5-6 minutes or until the dough transforms into a sticky, smooth lump. Kneading develops the gluten and turns it into sticky yet stretchable.
4.Resting Time
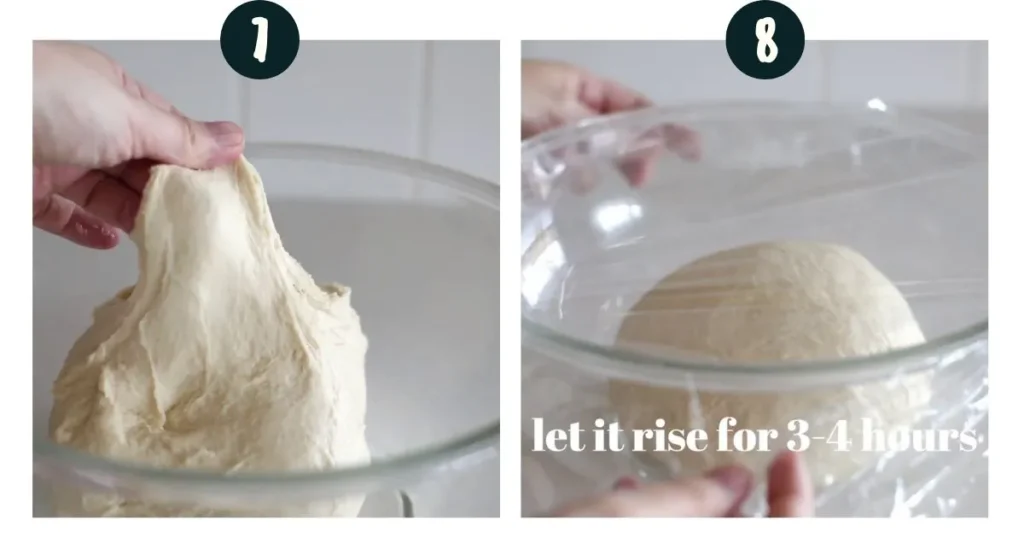
Transfer the dough to a large bowl and cover it with a large, damp towel or plastic wrap. Rest it for about 3-4 hours until the dough doubles in size. The resting time may vary depending on the kitchen temperature. 75°F-83°F (24°C-28°C) is ideal for rising. It fastens the fermentation process. The time of rise may increase if you are making it in winter.
5.Cold Proofing
Transfer the covered dough to the refrigerator, let it cool, and ferment for 12 hours (overnight or up to 24 hours). This slows down the fermentation activity. The texture will transform to sticky to tight dough that is easy to handle and matches busy schedules.
6.Divide and Shape
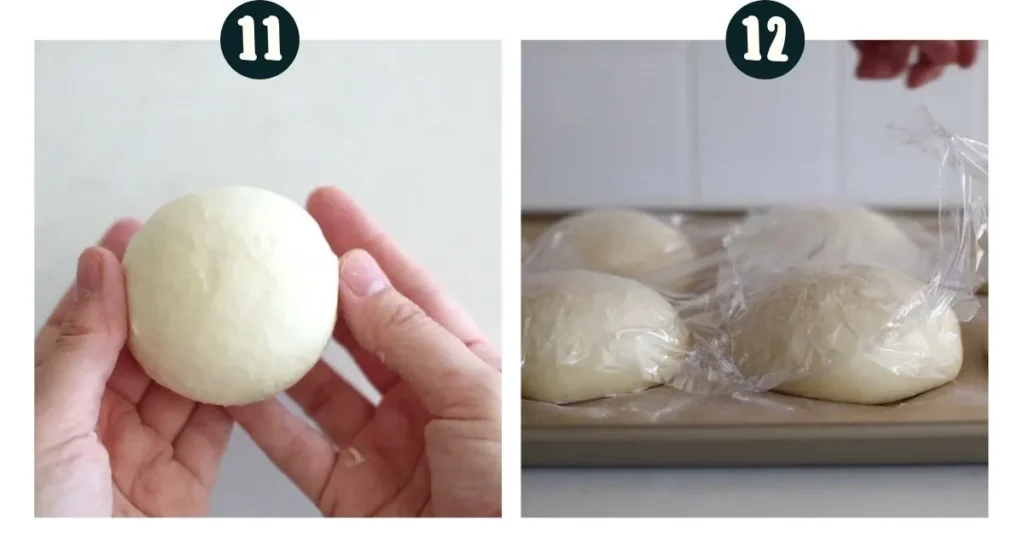
Cut the dough using a dough scraper and divide it into 8 equal parts using a weight scale. Shape each piece of dough by folding on itself and pinching to a point, creating a ball shape. Rotate on the work surface for an even ball shape.

7.Arrange on Baking Tray
Arrange the ball-shaped dough onto the baking tray lined with parchment paper such that the groove side of the bun is down, and the smooth side is up. Arrange all shaped dough with a distance in between because they will hold their place in the final rise.
8.Final Proofing
Cover the shaped dough buns with a plastic wrap or tea towel and let them rest for 2-3 hours until they are puffy.
9.Egg Wash and Sesame Seeds (Optional)
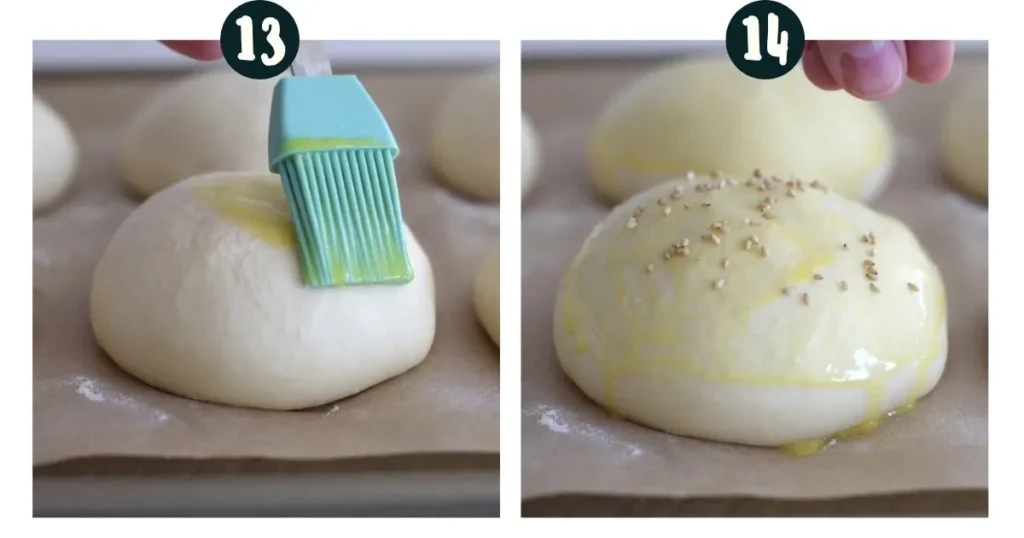
Brush the buns with beaten egg and water. Top each dough bun with sesame seeds. The egg wash helps the sesame seeds stick to the buns.
1.Bake
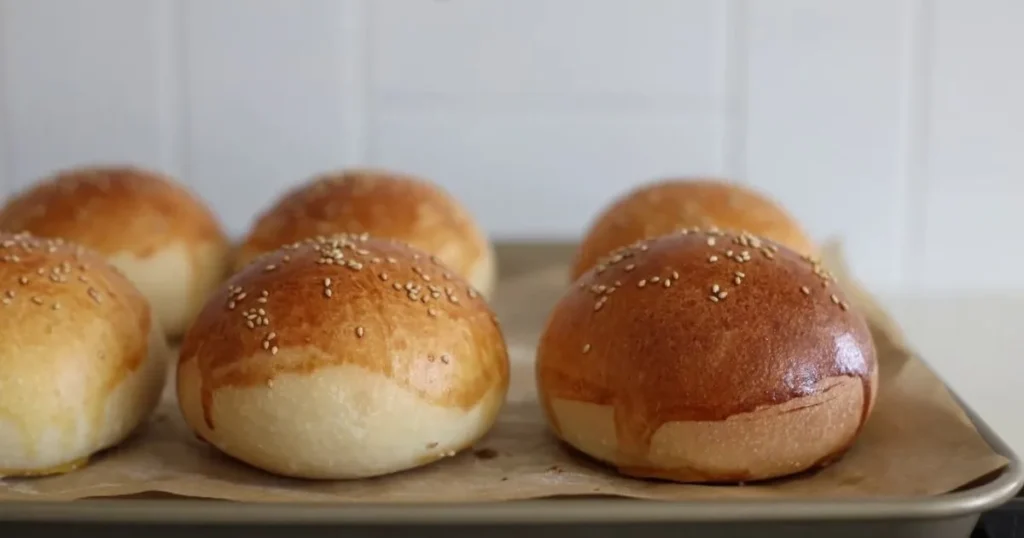
Set the oven to 375º F and bake the buns for 20-25 minutes until they are nice and brown and crusty. Once done, transfer them to a cooling rack and enjoy them fresh. Cut them in the center and fill them with your favorite patty or any filling of your liking.
Tips To Master the Sourdough Buns Art!
- Use fresh and active sourdough starter. The time before you feed your starter should be more than 4 hours. The starter will get bubbly and increase before using. The time can vary depending on the temperature and environment.
- The dough is sticky, so I advise you to wet your hands each time you handle it directly.
- If the dough is too soupy or slimy, incorporate flour while kneading. Lightly dust the working surface with flour while handling the dough and shaping it.
- Sourdough dough is sticky because of its hydrated dough. The more hydration, the better, soft, and spongy buns will be created. It is usually more difficult to handle than normal dough, but not impossible. Just follow the steps of this recipe.
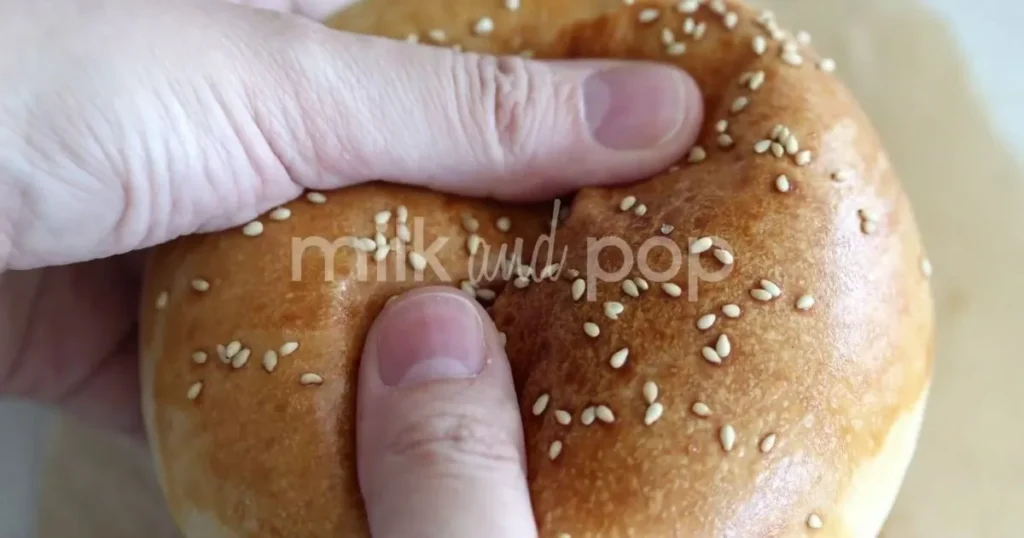
- Proofing before baking is essential. Because of the final proofing for 2-3 hours, the bread will poke, rise, and occupy more space. You will know whether the dough is ready for final baking by poking your finger. If it leaves a furrow or impression on the dough and then, after a few seconds, returns to its original shape, then it is ready for baking.
Hydration of Buns
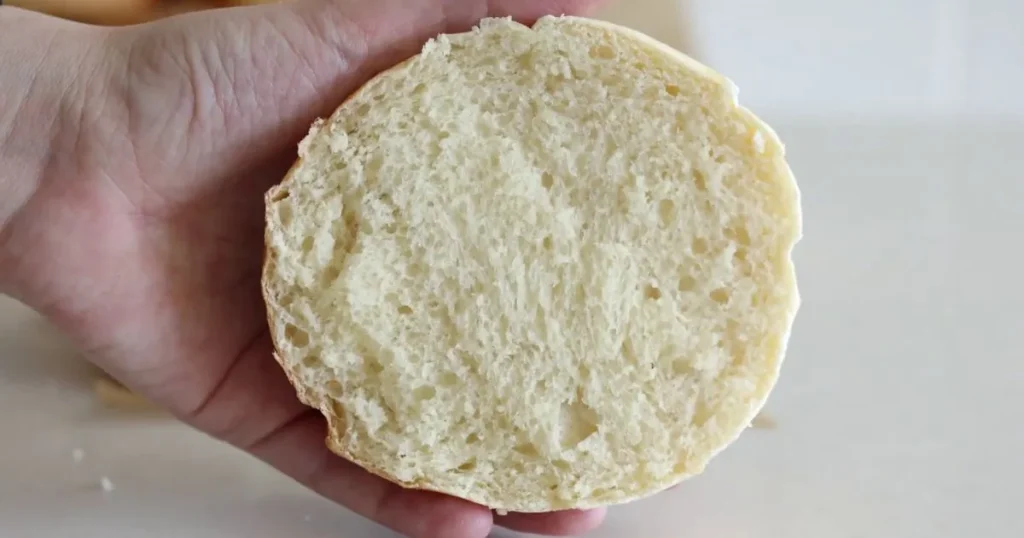
Our bun is 47% hydrated sourdough burger buns. The formula for hydration is water-to-flour ratio. In our case, (237g water divided by 500g flour) x 100 = 47% hydrated dough. I am adding the egg to moisten the buns. Moreover, the starter already has water, so it balances the hydration ratio.
Make Ahead of Time
Freshly baked buns are good to eat within 2-3 days. However, if you want to freeze them, they can be stored for up to 3 weeks. Keep the baked buns in a freezer-safe bag and freeze them. Enjoy whenever you are craving them by thawing them at room temperature or warming them in an oven.
Print
Sourdough Hamburger Buns Better Than Store-Bought
- Total Time: 45 minutes
Description
Sourdough hamburger buns are nice, fluffy, and a soft canvas for any burger and go well with any sandwich filling. Light brown crusty top and an inside spongy bread is so fun to make at home!!
You all know summer is here, so what’s better than a big hamburger with a meat patty, lots of greens, cheese, and a big heirloom tomato slice? Whether a BBQ party or an outdoor cooking Burger is a must.
Ingredients
- 60g of melted unsalted butter
- 237g water
- 125 g active sourdough starter
- 1 large egg
- 2 ½ tbsp granulated sugar
- 1 tsp salt
- 500g bread flour
- Egg wash and sesame seeds (optional)
- 1 egg yolk
- 1 tablespoon water
- 2 tbsp Sesame seeds for topping
Instructions
- Whisk the Wet Ingredients: In a stand mixer bowl, mix water, melted butter, egg, and sourdough starter with a whisk until a smooth wet mixture is formed. Mixing wet ingredients is important to create a smooth liquid mixture and dissolve the sourdough starter evenly.
- Add the Dry Ingredients: Add sugar, salt, and bread flour to the wet mixture and roughly mix with a spoon.
- Knead To Dough: Place the bowl in a stand mixer with a dough hook attachment and knead the dough for 5-6 minutes or until the dough transforms into a sticky, smooth lump. Kneading develops the gluten and turns it into sticky yet stretchable.
- Resting Time: Transfer the dough to a large bowl and cover it with a large, damp towel or plastic wrap. Rest it for about 3-4 hours until the dough doubles in size. The resting time may vary depending on the kitchen temperature. 75°F-83°F (24°C-28°C) is ideal for rising. It fastens the fermentation process. The time of rise may increase if you are making it in winter.
- Cold Proofing: Transfer the covered dough to the refrigerator, let it cool, and ferment for 12 hours (overnight or up to 24 hours). This slows down the fermentation activity. The texture will transform to sticky to tight dough that is easy to handle and matches busy schedules.
- Divide and Shape: Cut the dough using a dough scraper and divide it into 8 equal parts using a weight scale. Shape each piece of dough by folding on itself and pinching to a point, creating a ball shape. Rotate on the work surface for an even ball shape.
- Arrange on Baking Tray: Arrange the ball-shaped dough onto the baking tray lined with parchment paper such that the groove side of the bun is down, and the smooth side is up. Arrange all shaped dough with a distance in between because they will hold their place in the final rise.
- Final Proofing: Cover the shaped dough buns with a plastic wrap or tea towel and let them rest for 2-3 hours until they are puffy.
- Egg Wash and Sesame Seeds (Optional): Brush the buns with beaten egg and water. Top each dough bun with sesame seeds. The egg wash helps the sesame seeds stick to the buns.
- Bake: Set the oven to 375º F and bake the buns for 20-25 minutes until they are nice and brown and crusty. Once done, transfer them to a cooling rack and enjoy them fresh. Cut them in the center and fill them with your favorite patty or any filling of your liking.
Notes
- Use fresh and active sourdough starter. The time before you feed your starter should be more than 4 hours. The starter will get bubbly and increase before using. The time can vary depending on the temperature and environment.
- The dough is sticky, so I advise you to wet your hands each time you handle it directly.
- If the dough is too soupy or slimy, incorporate flour while kneading. Lightly dust the working surface with flour while handling the dough and shaping it.
- Sourdough dough is sticky because of its hydrated dough. The more hydration, the better, soft, and spongy buns will be created. It is usually more difficult to handle than normal dough, but not impossible. Just follow the steps of this recipe.
- Proofing before baking is essential. Because of the final proofing for 2-3 hours, the bread will poke, rise, and occupy more space. You will know whether the dough is ready for final baking by poking your finger. If it leaves a furrow or impression on the dough and then, after a few seconds, returns to its original shape, then it is ready for baking.
- Prep Time: 20 minutes
- Cook Time: 25 minutes
- Category: sourdough
FAQ’s for This Sourdough Hamburger Buns
Why are my sourdough hamburger buns so dense?
You probably dusted too much flour while shaping them, which makes the overall dough tough and dense. Proofing and fermentation are most important. Consider resting the dough for the calculated time to get soft buns.
What happens if you put too much sourdough starter in your bread?
Adding too much sourdough starter can speed up the fermentation process. The resting and proofing time may vary, and the resting time may become short. The starter already has a lot of water, so add an extra amount of flour until the desired consistency is attained.
How do you activate your sourdough starter?
The sourdough starter is activated by adding an equal amount of flour and water and mixing with a spoon. Loosely cover the starter and keep it at 24°C-28°C (approximately room temperature). The starter will become active, rise, and bubbly after 4-8 hours or maybe longer, depending on the temperature and environmental conditions.

